A simple cleaning makes a huge difference for your olive oil and balsamic dispenser. This quick cleanup for your oil and vinegar bottles preserves freshness. You can maximize flavor from your oil and vinegar.
Proper care for your oil and vinegar bottles keeps oils and vinegars pure, ensuring your oil and vinegar tastes perfect.
Essential Tools for a Squeaky-Clean Dispenser
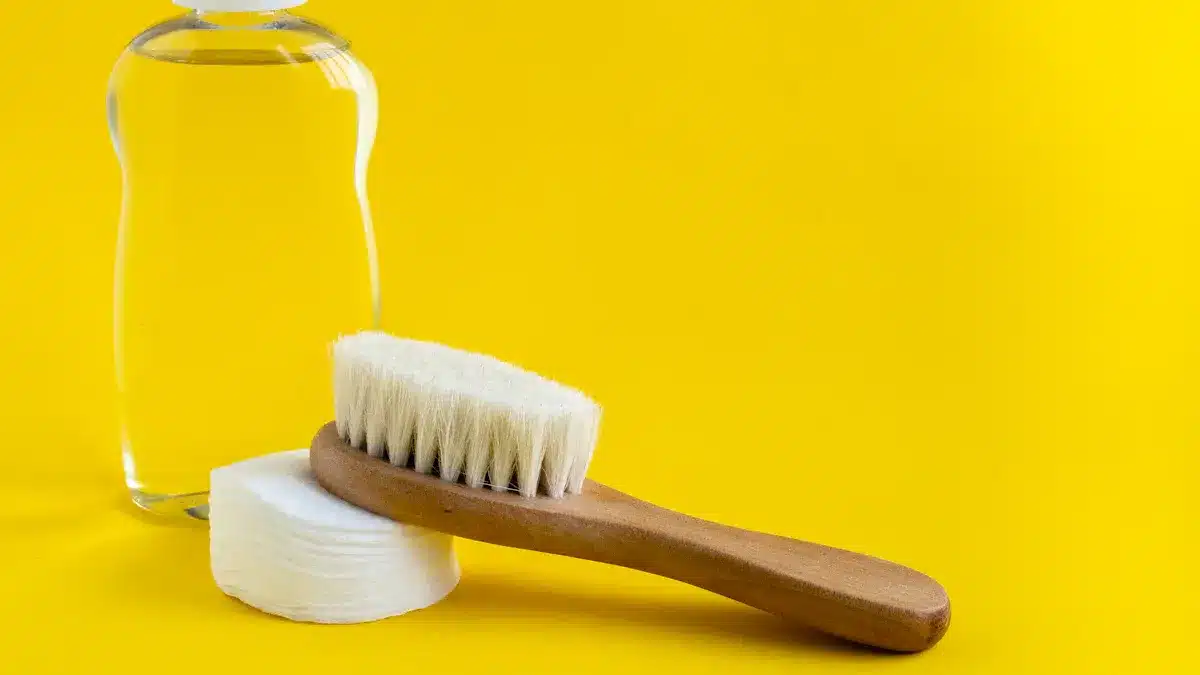
You don’t need a lot of fancy equipment to get your olive oil and balsamic dispenser sparkling clean. Having just a few simple tools on hand makes the job quick and easy. Let’s gather your cleaning kit.
Bottle Brush
A long-handled bottle brush is your best friend for this task. Its bristles can scrub the inside walls of your oil and vinegar bottles. This removes any film or residue that you can’t reach with a regular sponge.
Small Spout Brush or Pipe Cleaner
The narrow spout is where clogs love to form. A tiny spout brush or even a flexible pipe cleaner is perfect for getting into this tight space. This little tool ensures your oil and vinegar pour smoothly every time.
Dish Soap
A good dish soap is essential for cutting through greasy buildup. Plant-based soaps are excellent choices because they clean effectively without leaving behind a sticky film.
Pro Tip: Look for soaps with plant-powered surfactants. They are great at breaking down tough grease from oil and vinegar. Consider these options:
- Therapy Clean Dish Soap removes residue and rinses clean.
- Blueland Powder Dish Soap offers powerful plant-based cleaning.
- Castile Soap is a gentle yet effective option for your oil and vinegar bottles.
White Vinegar or Baking Soda
For stubborn residue, white vinegar and baking soda are a powerful duo. When you mix them, they create a fizzing reaction. This chemical reaction produces carbon dioxide gas bubbles that actively scrub away tough, baked-on grime from both oil and vinegar. It’s a fantastic, natural way to deep clean your dispenser.
A Step-by-Step Cleaning Guide
Ready to get your dispenser looking and pouring like new? This step-by-step guide makes the entire cleaning process a breeze. Following these instructions ensures a thorough cleanup for your oil and vinegar bottles.
Step 1: Empty and Disassemble
First things first, you need a clean slate. Pour out any remaining oil or vinegar. You can save it in another container if you plan to use it soon.
Next, carefully take your dispenser apart. Separate the spout from the bottle. If your spout has multiple pieces like a cap, tube, or closure, disassemble those too. Pay attention to how everything fits together. This will make reassembly much easier later.
Step 2: The Initial Wash
Now it’s time for a good wash. Fill your sink with hot, soapy water. The heat helps break down greasy residue. Submerge the bottle and all its parts. Use your bottle brush to scrub the inside of the bottle, reaching all the way to the bottom.
Pro Tip: Water temperature matters! Different stains respond better to different temperatures. Use this simple guide for your oil and vinegar bottles.
Stain Type Recommended Water Temperature Oil-based stains Hot water Vinegar stains Cold water
Warm water also boosts vinegar’s power to dissolve grime, making it a great partner for this easy cleanup.
Step 3: Clean the Spout and Parts
The spout is where clogs happen, so it needs special attention. A little extra care here will keep your oil and vinegar flowing smoothly.
- Flush the System: Hold the spout mechanism under hot running water. If it has a pump, submerge the dip tube in hot water and pump it several times to flush out any old residue.
- Scrub the Details: Use your small spout brush or a cotton swab dipped in soapy water to clean all the nooks and crannies. Gently scrub the inside of the spout, the threads where it screws on, and any other small parts.
- Sanitize (Optional but Recommended): For a deep clean, you can sanitize the spout. Soaking the parts for 10-15 minutes in a solution of water and a little white vinegar can help remove any lingering bacteria.
Step 4: Rinse and Dry Completely
This final step is the most important one for preserving the taste of your oil and vinegar. You must rinse every part thoroughly with clean water to remove all soap residue.
After rinsing, drying completely is essential. Any leftover water droplets can cause problems.
⚠️ Heads Up! Refilling your dispenser before it’s bone-dry can lead to bacterial contamination. These “water-olive oil reunions” can spoil your fresh oil and ruin its flavor.
Here are two great ways to air-dry your olive oil and balsamic dispenser perfectly:
- Go Upside Down: Place the bottle upside down on a drying rack or a clean, lint-free towel. This lets all the water drain out naturally and prevents water spots.
- Pat Gently: If you’re in a hurry, use a soft, lint-free cloth to gently pat all the parts dry. Avoid rubbing, which could leave lint behind. Make sure every piece is completely dry before you put it all back together.
How to Tackle Tough Residue and Clogs
Sometimes, a simple wash isn’t enough. You might face sticky balsamic goo, hardened oil, or a mysterious cloudy film on your glass. Don’t worry! These tough problems have simple solutions. Let’s get your dispenser back to pristine condition.
For Sticky Balsamic Buildup
Balsamic vinegar contains natural sugars. Over time, these sugars can build up around the spout and inside the bottle, creating a sticky, stubborn mess. This buildup can even seal your dispenser shut.
Tackling the Stickiness: The key is heat and patience.
- Soak the spout and any sticky parts in a bowl of very hot water for 15-20 minutes. The heat will dissolve the crystallized sugar.
- After soaking, use your small spout brush to scrub away any remaining residue.
- For buildup inside the bottle, fill it with hot water and a few drops of dish soap. Let it sit for a while before scrubbing with your bottle brush.
For Hardened Olive Oil
Have you ever noticed a hard, amber-colored residue in your oil dispenser? This happens when old olive oil is exposed to air and light. It polymerizes, turning into a tough, plastic-like substance that soap and water can’t remove. For this job, you need a gentle abrasive.
A baking soda paste provides an easy cleanup solution.
- Create a thick paste by mixing baking soda with a small amount of water.
- Apply the paste directly to the hardened oil spots inside your bottle.
- Let the paste sit for about 15 minutes to work its magic.
- Use your bottle brush to gently scrub the areas. The baking soda will help lift the hardened oil without scratching the glass.
- Rinse thoroughly with hot water to wash away all the paste and residue.
For Cloudy Glass
A cloudy dispenser can make your beautiful oil and vinegar look unappealing. This cloudiness often isn’t from the liquids themselves but from external factors. Understanding the cause helps you fix it.
Your glass might be cloudy for several reasons:
- Airborne particles from cooking, dust, or even your AC system can settle on the glass.
- Chemicals from cabinet finishes or new furniture can create a film.
- Residue from air fresheners or essential oil diffusers may be the culprit.
- The glass composition itself can play a role. Some types of glass are simply more prone to becoming cloudy over time.
To restore clarity, a vinegar soak is your best bet for this cleanup.
- Fill a bowl with warm white vinegar. Place your cloudy dispenser in the bowl and let it soak for 20-30 minutes. For very stubborn cloudiness, you can soak it for up to an hour.
- After soaking, gently scrub any remaining cloudy spots with a soft cloth.
- Wash the dispenser with regular dish soap and warm water.
- Rinse it completely with clean water.
- Finally, dry the glass immediately with a lint-free microfiber cloth. Do not let it air-dry, as this can cause new water spots to form.
For Extra-Tough Cloudiness: If the vinegar soak doesn’t cut it, try the baking soda paste method mentioned earlier. Gently scrub the glass in circular motions. Baking soda is abrasive, so use light pressure to avoid scratches on your oil and vinegar dispenser.
Cleaning Your Olive Oil and Balsamic Dispenser by Material
The material of your dispenser determines the best cleaning method. Proper care for your oil and vinegar bottles ensures they last a long time and look great in your kitchen. Let’s explore how to clean glass, stainless steel, and ceramic.
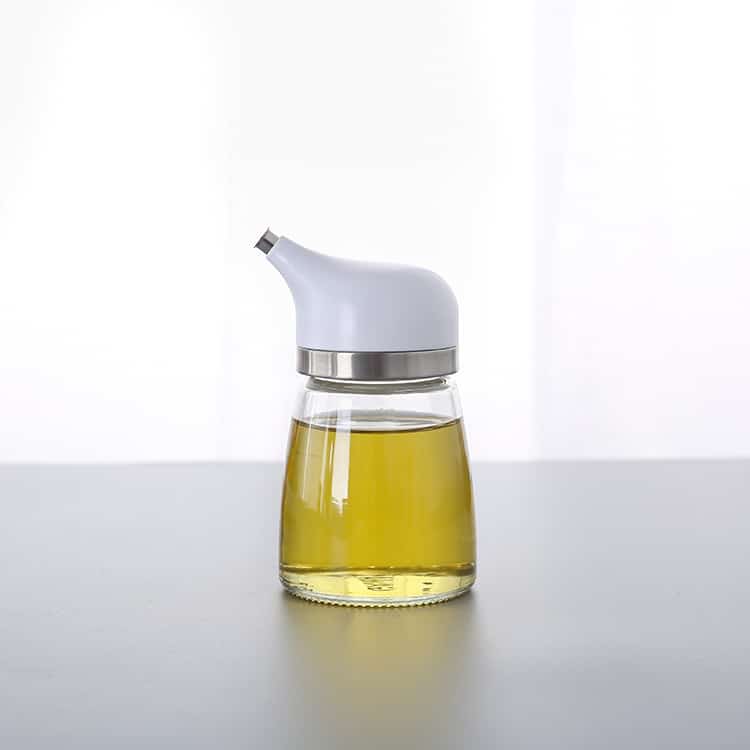
Caring for Glass Bottles
Glass is a popular choice for its classic look. Most glass oil and vinegar bottles are easy to clean with soap and water. However, some types are better than others. Borosilicate glass, for example, offers great chemical stability and resists high temperatures. This makes it less likely to get cloudy from reactions with its contents.
A skincare brand once had to recall products because their toner reacted with standard glass. Switching to borosilicate glass reduced these issues by over 95%, showing how durable it is.
If you have decorative or colored glass, be careful. You should avoid certain cleaners that can damage the finish.
- Vinegar-based solutions
- Citrus-based solutions
- Alcohol-based cleaners
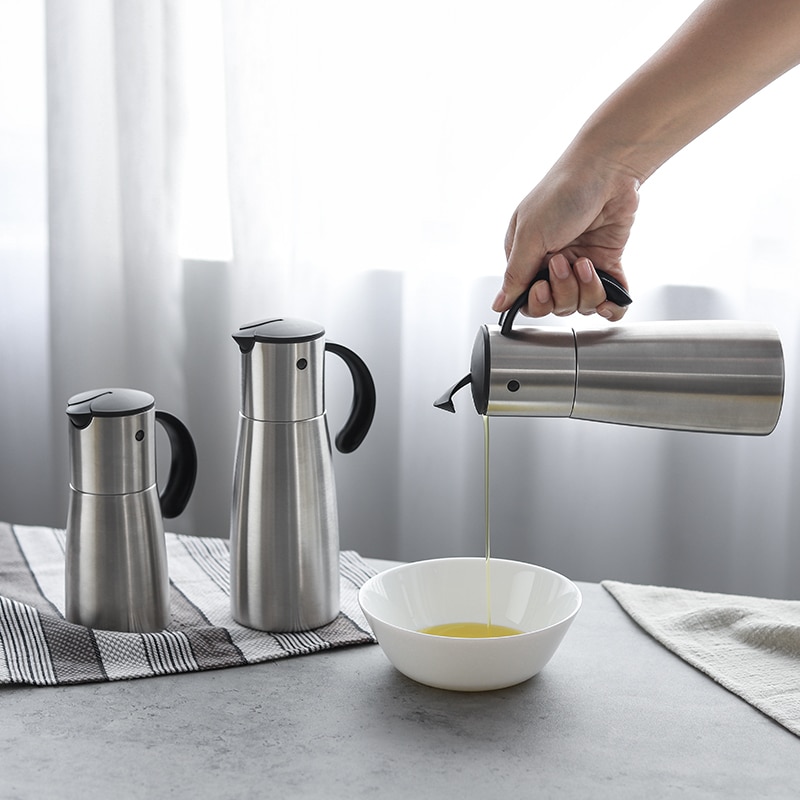
Cleaning Stainless Steel
Stainless steel offers a sleek, modern look. To keep it shining, always clean with the grain of the metal. This simple trick prevents dulling and scratches. Use a soft microfiber cloth and gentle soap. You should wipe up spills quickly to avoid stains. Never use abrasive cleaners, steel wool, or anything with chlorine, as these can strip the protective layer and cause damage. After washing, dry the steel completely to prevent water spots.
Handling Ceramic Dispensers
Ceramic dispensers add a rustic charm to any countertop. How you clean them depends on the finish. Abrasive cleaners can harm the protective coating on glazed ceramics, making them harder to clean over time.
| Ceramic Type | Cleaning Recommendation | Risk of Abrasive Cleaners |
|---|---|---|
| Glazed | Use a gentle, non-abrasive cleaner. | High risk; can damage the protective coating. |
| Unglazed | May need more intensive cleaning. | Lower risk, but too much scrubbing can still cause damage. |
Always choose a ceramic olive oil and balsamic dispenser that is labeled “food-grade” and “lead-free.” A quality dispenser uses non-porous clay, which prevents it from absorbing liquids or odors.
Essential Maintenance Tips
Keeping your dispenser in top shape is simple with a few good habits. Proper maintenance ensures your oil and vinegar always taste fresh and your dispenser lasts for years. This routine cleanup will also lead to a cleaner kitchen overall.
How Often Should You Clean It?
You don’t need to wash your dispenser every day, but you should clean regularly to prevent buildup. The right frequency depends on how you use it.
When to Wash:
- Switching Oils: Always wash the dispenser when you switch to a new type or brand of oil. This prevents flavors from mixing.
- Checking for Freshness: If you use the same oil, give it a quick sniff before refilling. If it smells fresh, you’re good to go. If it smells stale or rancid, it’s time for a wash.
Proper Storage for Longevity
Where you keep your dispenser matters. Olive oil’s biggest enemies are light, air, and heat. Proper storage protects both the oil’s flavor and the dispenser itself.
- Keep it Dark: Store your dispenser in a dark cupboard, away from windows. UV rays from sunlight can degrade your oil.
- Keep it Cool: The ideal temperature is between 50°F and 75°F. Avoid placing it near your stove, oven, or other heat sources.
Materials like dark glass and stainless steel are great because they block light and resist temperature changes, helping your oil and dispenser last longer.
Choosing an Easy-to-Clean Dispenser
When buying a new dispenser, think about the ease of cleaning. A smart choice makes maintenance a breeze. Look for dispensers with wide openings and detachable parts. These features allow for a more thorough wash and an easy cleanup. A good spout not only controls the pour but should also be simple to take apart.
| Feature | Wide-Mouth Dispensers | Narrow-Mouth Dispensers |
|---|---|---|
| Cleaning | Simple to scrub with a sponge. | Requires a special bottle brush. |
| Drying | Dries quickly with good airflow. | Traps moisture and dries slowly. |
| Refilling | Easy to fill without a funnel. | Spills are more likely. |
A wide-mouth glass bottle is often the best choice. It’s non-reactive, stain-resistant, and dries quickly, preventing any moisture from spoiling your next batch of oil.
A simple cleaning is the secret to a great cleanup for your oil and vinegar bottles. This easy cleanup helps you maximize flavor from your oil and vinegar. Your olive oil and balsamic dispenser will thank you. You will maximize flavor from your oil and vinegar. Make it a habit to clean your oil and vinegar bottles with every refill.
FAQ
Can I put my dispenser in the dishwasher?
Check the manufacturer’s instructions. Most glass bottles are top-rack safe. You should always handwash the spout and any delicate parts to prevent damage and ensure a thorough clean.
How do I get rid of a rancid smell?
A rancid smell requires a deep clean. Fill your dispenser with a solution of warm water and white vinegar. Let it soak for 30 minutes before washing thoroughly.
Do I need to clean it every time I refill?
Not always. You can refill if you use the same oil and it smells fresh. A full cleaning is best when switching oils or if you notice any residue.