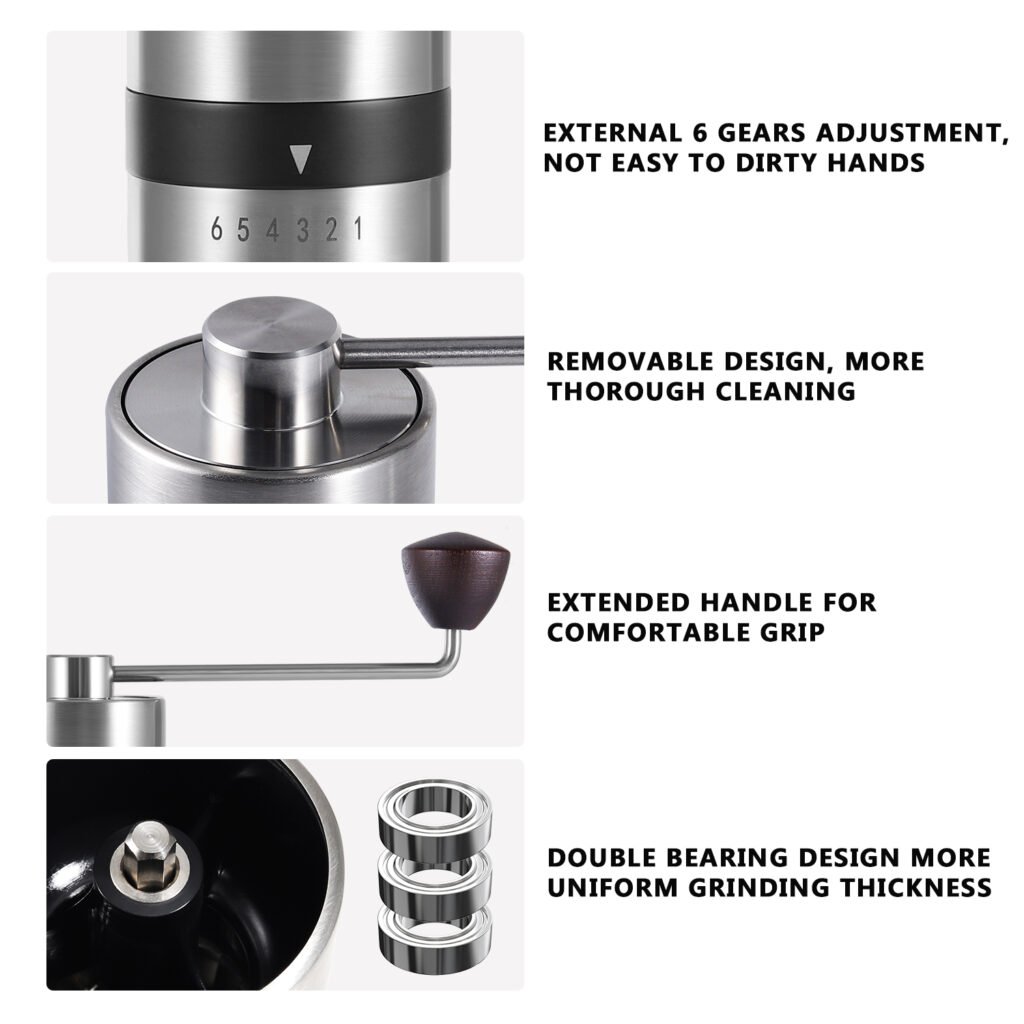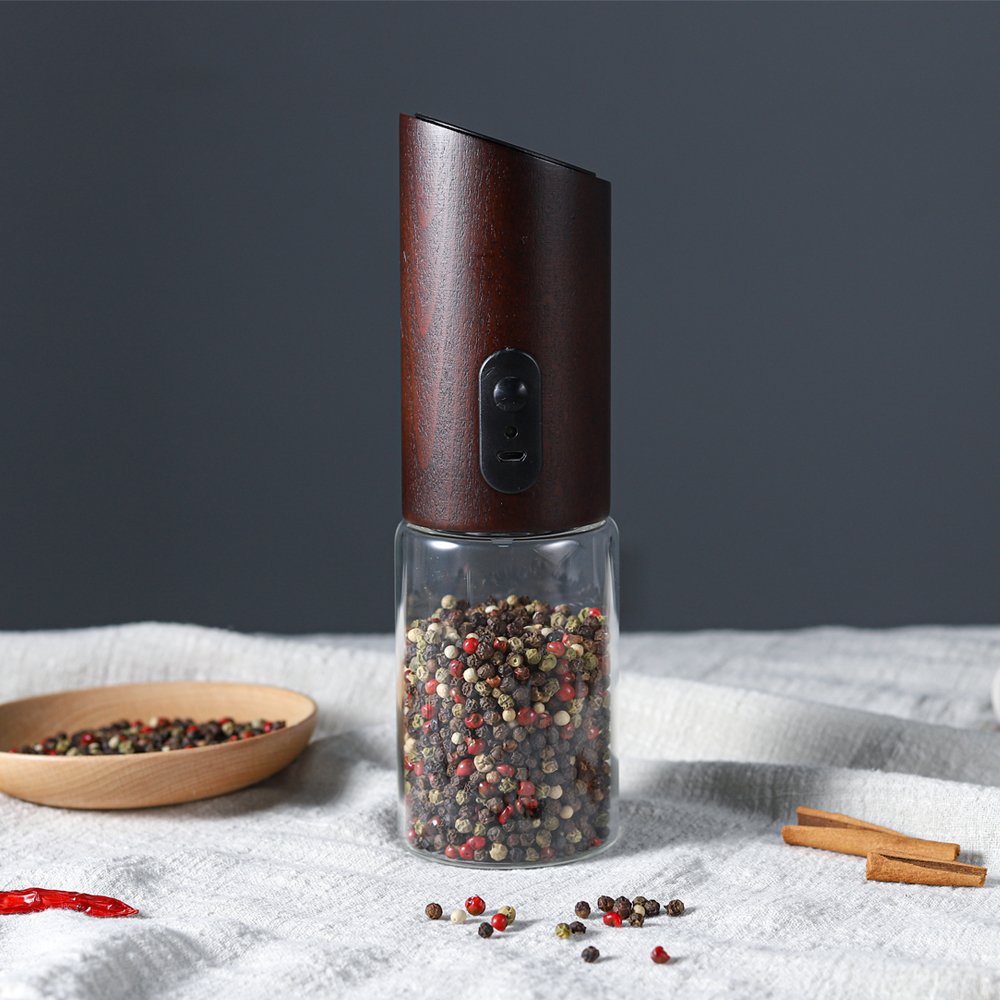
You want every cup of coffee to taste incredible. Regularly caring for your electric mini coffee grinder guarantees the freshest and best-tasting coffee. When you keep your grinder clean, you protect your investment and enjoy smooth performance from your electric mini coffee grinder every day.
Why Clean Your Electric Mini Coffee Grinder Regularly
Better Coffee Flavor Every Time
You deserve the best flavor from every cup of coffee. When you clean your grinder, you remove old grounds and oils that can spoil the taste. Freshly ground coffee always tastes richer and more aromatic. Studies show that reducing static and clumping in your grinder leads to more uniform grounds. This means your espresso or drip coffee will extract better, giving you a smoother, more balanced flavor. Clean equipment lets you enjoy the full range of flavors in your favorite beans.
Tip: Clean grinders help you avoid bitter or stale notes in your coffee.
Longer Life for Your Grinder
A well-maintained grinder lasts much longer. Dust, oils, and leftover coffee particles can build up inside your electric mini coffee grinder. This buildup can cause parts to wear out faster. By cleaning regularly, you protect the motor and blades or burrs. You also reduce the risk of jams or blockages. A clean grinder runs smoothly and stays reliable for years.
Fewer Breakdowns and Malfunctions
Regular cleaning keeps your grinder working at its best. When you let coffee residue collect, your grinder may start to make strange noises or stop working altogether. Clean grinders have fewer breakdowns and need less repair. The following table shows how cleaning and reducing static can improve your grinder’s performance:
| Aspect Measured | Observed Effect | Quantitative Result |
|---|---|---|
| Static charge reduction | Less clumping, smoother grind | Charge-to-mass ratio halved |
| Grinder retention | Less coffee wasted inside the grinder | Retention dropped from >10% to ~2.5% |
| Espresso extraction | Better flow and higher quality | TDS increased by 0.6% |
You save time and money by avoiding unexpected repairs. Clean your grinder, and you will enjoy fresh coffee every day without hassle.
What You Need: Tools and Products for Coffee Grinder Cleaning

Essential Cleaning Tools for Electric Mini Coffee Grinders
You want your electric mini coffee grinder to last and deliver the best flavor. The right tools make cleaning easy and effective. Start with a small, soft-bristled brush. This tool helps you sweep away coffee grounds from hard-to-reach spots. Many coffee experts recommend using a brush after each use. A microfiber cloth works well for wiping the exterior and the hopper. You can also use a wooden or plastic stick to loosen stubborn grounds without scratching the surface.
Tip: Never use metal tools. They can damage your grinder’s parts.
A review from The Daily Press highlights that electric mini grinders are not dishwasher-safe. You should always wipe them with a damp cloth and dry them thoroughly. This careful approach keeps your grinder in top shape and prevents moisture damage.
Safe Cleaning Products for Coffee Equipment
You need safe products to protect your grinder and your coffee’s taste. Grinder cleaning tablets, such as Urnex Grindz, remove oils and residue from the burrs or blades. These tablets are food-safe and easy to use. Just run them through your grinder as you would coffee beans. The New York Times Wirecutter guide recommends these tablets, along with compressed air for deep cleaning. Avoid harsh chemicals or soaps, as they can leave unwanted flavors behind.
Choose products designed for coffee grinder cleaning. They keep your equipment clean and your coffee pure. Regular cleaning with the right tools and products ensures your grinder performs at its best every day.
Daily Tips to Keep Your Coffee Grinder Clean
Keeping your electric mini coffee grinder in top shape does not have to feel like a chore. You can make cleaning part of your daily coffee ritual. These tips to keep your coffee grinder clean will help you enjoy better flavor and a longer-lasting grinder. When you follow these steps, you protect your investment and ensure every cup tastes fresh.
Quick Cleaning Steps After Each Use
You want your grinder to deliver consistent grinds every time. After each use, take a few moments to remove leftover coffee grinds and residue. This habit prevents buildup and keeps your grinder running smoothly.
Here’s a simple routine you can follow:
- Unplug your grinder before you start cleaning.
- Remove the hopper and grounds container.
- Use a soft brush to sweep out any remaining coffee grinds from the grinding chamber.
- Wipe the exterior with a dry or slightly damp microfiber cloth.
- Check for any stuck grinds around the blades or burrs and gently brush them away.
Tip: Quick cleaning after each use keeps oils and residue from affecting the taste of your coffee.
You will notice your grinder stays cleaner and works better when you make this a habit. Consistent cleaning also helps you avoid stale flavors and ensures your coffee always tastes its best.
Emptying and Wiping the Hopper and Grounds Container
The hopper is where you store your coffee beans before grinding. If you leave beans or grinds in the hopper, they can absorb moisture and lose freshness. Cleaning the hopper regularly is one of the most effective tips to keep your coffee grinder clean.
Follow these steps for cleaning the hopper and grounds container:
- Always empty the hopper after each use. Pour out any leftover beans.
- Use a dry cloth to wipe the inside of the hopper. This removes oils and dust that can build up over time.
- For deeper cleaning, remove the hopper completely. Wash it with warm water and mild soap if the manufacturer allows. Dry it thoroughly before reattaching.
- Wipe the grounds container with a clean, dry cloth. Make sure no coffee grinds remain inside.
- Inspect the hopper for any cracks or residue. Replace it if you notice damage.
| Step | Action | Benefit |
|---|---|---|
| Empty the hopper | Remove leftover beans and grinds | Prevents stale flavors |
| Wipe the hopper | Use a dry cloth for daily cleaning | Removes oils and dust |
| Deep clean hopper | Wash if allowed, dry completely | Maintains freshness |
| Clean grounds bin | Wipe with a dry cloth | Stops buildup of old grinds |
Note: Never use water on electrical parts. Focus on cleaning the hopper and grounds container only.
By cleaning the hopper and grounds container every day, you keep your grinder in peak condition. You also make sure your coffee always tastes fresh and delicious. Make cleaning the hopper part of your daily routine for the best results.
How Often to Clean a Coffee Grinder: Deep Cleaning Guide

When and Why Deep Cleaning Matters
You want every cup of coffee to taste fresh and full of flavor. Regular cleaning is not enough. You need to know how often to clean a coffee grinder with a thorough cleaning routine. Deep cleaning removes stubborn oils and residue that daily wiping cannot reach. If you skip this step, old coffee particles can build up and spoil the taste of your brew. Over time, this buildup can cause your grinder to work less efficiently or even break down.
Research shows that regular and thorough cleaning, especially using adhesive grinding techniques, removes sticky residues that often cause grinder problems. This process protects your equipment and keeps it running smoothly. Maintenance routines that include deep cleaning and lubrication help clear blockages and reduce friction. You will notice fewer breakdowns and enjoy better-tasting coffee. When you deep clean your coffee grinder, you prevent residue accumulation, thermal damage, and mechanical inefficiencies. This means your grinder lasts longer and delivers consistent results.
Tip: Set a reminder to deep clean your grinder every two to four weeks, depending on how often you use it.
Step-by-Step Deep Cleaning for Blade Grinders
You want your blade grinder to perform at its best. Cleaning blade coffee grinders is simple when you follow expert advice. Here is a step-by-step guide to help you deep clean your coffee grinder and keep your coffee tasting great:
- Unplug your grinder before you start. Safety comes first.
- Pour about 1/4 cup of uncooked white rice into the grinder. The rice acts as a natural abrasive and absorbs oils.
- Run the grinder for about a minute. The rice will turn into a fine powder and pull out trapped coffee particles.
- Discard the rice flour. It now contains old coffee oils and residue.
- If your grinder allows, remove the grinding chamber. This gives you access to hard-to-clean areas.
- Wash the grinding chamber with warm, soapy water. Rinse well and let it air dry completely.
- Use a damp cloth or a small brush, like a toothbrush, to clean the blades. Be careful not to cut yourself.
- Wipe down the rest of the grinder with a damp cloth. Make sure all parts are dry before putting them back together.
- Reassemble the grinder securely. Check that all parts fit snugly.
- Stick to a regular cleaning schedule. This keeps your grinder in top shape and your coffee tasting fresh.
Note: Clean your grinder at least once a week if you use it daily. This prevents buildup and keeps your coffee pure.
Step-by-Step Deep Cleaning for Burr Grinders
Burr grinders need special care to deliver the best grind and flavor. Cleaning burr coffee grinders takes a few extra steps, but the results are worth it. Here is how you can deep clean your burr grinder and keep it running like new:
- Unplug the grinder to ensure safety.
- Remove the hopper and upper burr. Place these parts on a clean towel.
- Use a brush to remove trapped coffee particles from the burr. You can also wipe the burr with a damp cloth if needed.
- Clean the chamber and hopper with a small brush. Wipe with a dry cloth. For a more thorough cleaning, use a damp cloth with mild detergent. Dry all parts completely before reassembling.
- Reassemble the grinder. Make sure the burr fits snugly and all parts are secure.
- Test the grinder to check that it works properly.
Industry experts recommend cleaning your burr grinder every one to two weeks with a dedicated cleaner. Perform a deep clean once a month. You can use dry rice occasionally to absorb oils and residue. Replace the burr every six to twelve months to maintain grind quality.
| Cleaning Task | Frequency | Benefit |
|---|---|---|
| Quick clean (brush/cloth) | After each use | Removes loose grounds |
| Deep clean (disassemble) | Every 2-4 weeks | Removes oils and buildup |
| Replace burr | 6-12 months | Maintains grind consistency |
Pro Tip: Use high-quality, fresh beans to reduce oil buildup and make cleaning easier.
When you follow these steps, you protect your investment and enjoy the best coffee every day. Knowing how often to clean a coffee grinder and sticking to a schedule will keep your grinder in peak condition for years.
Practical Tips for Maintaining Your Electric Mini Coffee Grinder
Handling Removable Parts Safely
You want your electric mini coffee grinder to work safely and efficiently. Always handle removable parts with care during maintenance. When you remove and clean the burr, you protect your grinder from harmful bacteria and mold. Regular cleaning of parts like the hopper and grounds container keeps your coffee fresh and safe to drink.
- Removing and cleaning parts daily prevents mold and bacteria growth.
- Monthly deep cleaning with recommended solutions ensures thorough hygiene.
- Careful maintenance of removable parts reduces wear and tear.
- Well-maintained parts help your grinder perform at its best, giving you safe and consistent coffee every time.
Tip: Always unplug your grinder before removing any parts. This simple step keeps you safe and prevents accidental damage.
Removing Stubborn Coffee Residue
Stubborn residue can build up around the burr and inside your grinder. You need to tackle this to keep your coffee tasting great. Use a soft brush to reach into tight spaces around the burr. For tough residue, use a dedicated grinder cleaning tablet or a small wooden stick. Never use metal tools, as they can damage the burr and other parts.
If you notice residue that will not come off, remove and clean the burr thoroughly. Let all parts dry completely before reassembling your grinder. Consistent cleaning of the burr ensures your grinder delivers even, flavorful coffee every time. Make this part of your regular maintenance routine to enjoy the best results.
Common Mistakes to Avoid with Coffee Grinders
Using Water on Electrical Parts
You want your electric mini coffee grinder to last. Never use water on the electrical parts. Water can damage the motor and cause safety risks. If you spill water near the power cord or buttons, unplug the grinder right away. Dry the area with a towel. Always use a dry or slightly damp cloth for the exterior. For the inside, stick to brushes or cleaning tablets. This simple habit protects your investment and keeps your coffee routine safe.
Tip: Keep water away from all electrical components. You will avoid costly repairs and keep your grinder running smoothly.
Skipping Regular Cleaning Routines
You may feel tempted to skip a cleaning session. This mistake leads to stale flavors and poor performance. Old coffee oils and grounds build up fast. They clog the grinder and make your coffee taste bitter. Set a reminder on your phone or calendar. Make cleaning part of your daily or weekly routine. You will notice fresher coffee and a more reliable grinder.
- Regular care means better flavor.
- Consistent routines prevent breakdowns.
Overfilling the Grinder
You might think filling the grinder to the top saves time. In reality, overfilling causes jams and uneven grinding. Always check the recommended fill line. Use only the amount of beans you need for each brew. This practice gives you a consistent grind and protects the motor from strain.
| Mistake | What Happens | What To Do Instead |
|---|---|---|
| Overfilling | Jams, uneven results | Fill to the right level |
Remember: A little care goes a long way. Avoid these mistakes and enjoy great coffee every day.
Troubleshooting Your Electric Mini Coffee Grinder
What to Do If the Grinder Won’t Turn On
You expect your grinder to work every morning. If it does not turn on, check the power source first. Plug the grinder into a different outlet. Inspect the power cord for any damage. Make sure you have closed the lid securely. Many grinders have a safety lock that prevents operation if the lid is not in place. If your grinder still does not start, let it cool down for a few minutes. Overheating can trigger a safety shut-off. If these steps do not solve the problem, contact customer support for further help.
Tip: Always unplug your grinder before inspecting or cleaning it.
Fixing Unusual Noises or Smells
Strange noises or burning smells signal a problem. Stop using the grinder immediately. Remove any beans or grounds from the chamber. Use a brush to clear out stuck particles. Check for foreign objects inside the grinder. If you notice a burnt smell, the motor may have overheated. Let the grinder rest and cool down. Persistent issues may require professional service.
| Problem | Possible Cause | Solution |
|---|---|---|
| Loud grinding | Foreign object inside | Remove and clean |
| Burning smell | Overheated motor | Let it cool, clean unit |
Solving Inconsistent Grinding Results
You want every cup of coffee to taste perfect. If your grinder produces uneven grounds, check the burr or blade for residue. Clean the grinding mechanism thoroughly. Adjust the grind setting to match your brewing method. Avoid overfilling the chamber. Consistent cleaning and proper use guarantee even results and better-tasting coffee.
Note: Regular maintenance prevents most grinding issues and keeps your coffee routine smooth.
Quick-Reference Maintenance Checklist for Electric Mini Coffee Grinders
You want your electric mini coffee grinder to last and deliver the best results every day. A quick-reference checklist makes it easy to follow a regular maintenance routine. By sticking to this routine, you avoid common mistakes and keep your grinder running smoothly. Many coffee experts recommend using a checklist for daily and weekly care. This habit helps you catch small issues before they become big problems.
Daily Tasks:
- Unplug your grinder before cleaning.
- Empty the hopper and grounds container after each use.
- Wipe the exterior with a dry or slightly damp microfiber cloth.
- Use a soft brush to remove leftover grounds from the grinding chamber.
Weekly Tasks:
- Inspect the burr or blade for residue and buildup.
- Run grinder cleaning tablets or uncooked rice through the grinder.
- Check the power cord and plug for any signs of wear.
Monthly Tasks:
- Deep clean removable parts with warm, soapy water (if allowed).
- Dry all parts thoroughly before reassembling.
- Log the date and details of your maintenance in a notebook or app.
Pro Tip: Keeping a record of your regular maintenance and upkeep helps you spot patterns and prevent future issues.
A checklist supports consistent cleaning, inspection, and preventive care. You protect your investment and enjoy fresh coffee every time. Regular maintenance and upkeep extend the life of your grinder and ensure top performance.
You keep your electric mini coffee grinder in top shape with simple, regular cleaning. Fresh coffee rewards your effort every day. Follow these steps and use the checklist. You enjoy great taste and reliable performance for years. Take action now and make every cup count!
FAQ
How often should you replace the burr or blade in your grinder?
You should replace the burr or blade every 6 to 12 months. Fresh parts guarantee consistent grinds and the best coffee flavor.
Can you use flavored coffee beans in your electric mini coffee grinder?
You should avoid flavored beans. Oils and sugars from these beans can clog your grinder and affect the taste of future batches.
What should you do if your grinder smells bad after cleaning?
Let your grinder air out with the lid open. Run a batch of grinder cleaning tablets. This removes lingering odors and keeps your coffee tasting fresh.


